
Turn a process arrow ninety degrees in PowerPoint
Rotate a PowerPoint arrow by ninety degrees when a process changes from moving across a slide to moving down it. Select the arrow itself, open the rotation commands, and choose the appropriate ninety-degree turn. Rotation changes the object’s orientation; it does not automatically rearrange the surrounding process boxes. Check the arrowhead, endpoints, and nearby text after the turn so the diagram still communicates the intended sequence.
This practice exercise uses a blank slide and ordinary shapes in desktop PowerPoint for Windows. Microsoft documents rotating and flipping objects for current supported desktop editions, including Microsoft 365. Ribbon positions vary with window size and version. Some versions expose Rotate under Arrange, while contextual shape formatting tabs also provide arrangement controls. The article describes a reproducible task rather than claiming a software walkthrough was performed on your particular installation.
Make a two stage example
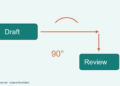
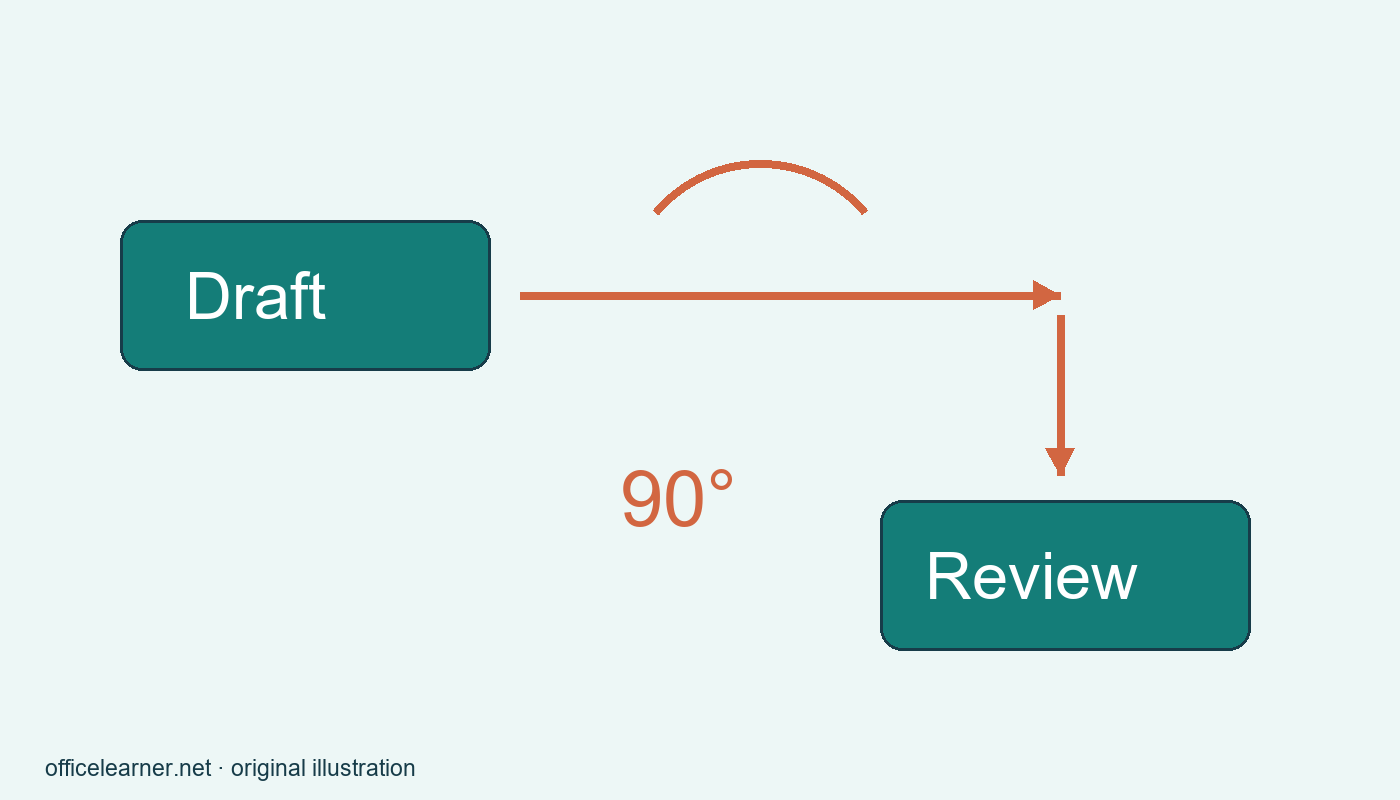
Create a blank presentation or add a blank slide to a practice file. Insert two rounded rectangles and label them Draft and Review. Put Draft on the left and Review on the right with a generous gap. Insert a right-pointing block arrow between them. Use a single strong color for the arrow and neutral fills for the boxes. The initial diagram should plainly mean that the draft goes to review, without needing a legend or decorative illustration.
Duplicate the slide before changing its layout. On the duplicate, move Review below Draft. Leave enough vertical space for the arrow and avoid placing either box against the slide edge. At this point, the arrow still points sideways and no longer matches the arrangement. This deliberately inconsistent state is useful: it isolates the change you need to make. Select the arrow, not the slide background and not one of the text boxes, before looking for rotation controls.
Apply a controlled turn
Open Arrange and Rotate, or the equivalent Rotate command on the Shape Format tab. Choose Rotate Right 90 degrees for the original right-pointing arrow to point down. Move it into the gap between Draft and Review. If you choose the opposite direction and the arrow points up, undo and choose the rightward ninety-degree turn. The labels should remain upright because you selected only the arrow. If they rotate too, inspect your selection or whether the objects were grouped.
Use the rotation handle for free rotation only when you actually need a free angle. A built-in ninety-degree command makes this particular exercise easier to reproduce than judging an angle by eye. Microsoft also points to More Rotation Options for precise rotation settings. You do not need to introduce an arbitrary angle for a simple vertical sequence. After rotating, click a blank area so selection handles disappear and examine the diagram as a viewer would see it.
Check direction before decoration
Read the sequence aloud: Draft goes down to Review. Follow the arrow with your eyes and confirm that its head is nearer Review than Draft. A perfectly centered arrow can still communicate the wrong direction. Similarly, a rotated arrow can overlap a box even when the turn itself is correct. Move it rather than changing the text labels to fit an accidental layout. The objects serve the explanation, and the sequence should remain clear at ordinary presentation size.
Keep a little space between the arrow and each box so the arrowhead is visible. If the arrow is too long, resize it carefully and inspect its proportions. Avoid a very narrow shaft or tiny arrowhead that vanishes when the slide is projected. The right size depends on the slide and room, so use Slide Show view as an additional reading check. This is a visual review suggestion rather than a claim that any particular dimensions guarantee accessibility.
Know when flipping is different
Rotation turns an object around its center. Flipping reflects it. On a simple symmetrical arrow, some flipped outcomes may look similar to a rotation, which can make the commands seem interchangeable. They are not generally interchangeable for asymmetric diagrams or pictures. In this exercise, use rotation because you are turning the direction of travel from horizontal to vertical. If an illustration contains text, examine that text after any transformation rather than assuming it stayed readable.
If you cannot find Rotate, confirm that an editable object is selected and expand the ribbon or Arrange menu. A small window may hide labels that appear in a wider view. If several objects turn unexpectedly, undo before making further changes and select only the arrow. If your arrow is part of a larger grouped diagram, work on a duplicate and understand the group structure before ungrouping it. Preserve the original slide as a reference until the new layout is complete.
Try a branching variation
Add a third box labeled Revise below Review on another duplicate slide. Use a second downward arrow to make Draft, Review, Revise into a vertical sequence. Then ask whether this is really the process you intended. If revision happens only after feedback, a simple straight sequence may omit an important decision. Rotating shapes cannot solve an incomplete explanation. For this practice, label it as a basic three-stage example and keep the scope small rather than inventing a complicated workflow.
Finally compare the original horizontal slide and the vertical duplicate. Check every arrowhead, all box labels, and the margins around the diagram. Ask another reader to state the order without prompting. Could they distinguish the start from the finish immediately? Save both slides with clear titles in the practice file. The result should demonstrate a controlled ninety-degree turn and a readable process, with the surrounding layout reviewed just as carefully as the rotation command itself.