
Align a slide diagram to a PowerPoint guide
Use a drawing guide as a shared reference when several objects on a PowerPoint slide should sit along the same vertical line. Turn on Guides in desktop PowerPoint, place a guide where the diagram needs its edge or center, and move each object into position. A guide is an editing aid rather than a printed line. The useful result is a diagram whose alignment remains understandable when you later replace a label or resize a shape.
Start with an intentionally uneven diagram
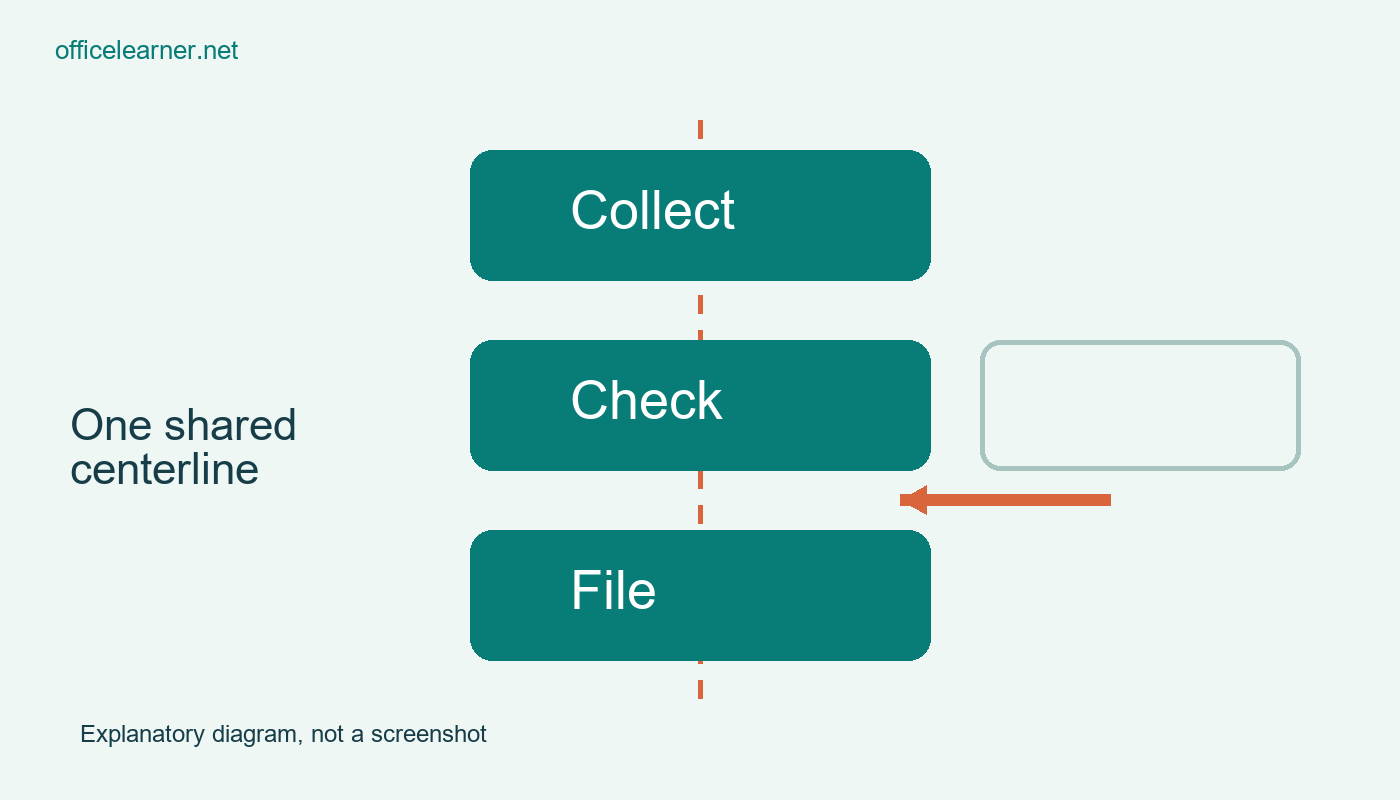
Make a practice presentation and choose a blank slide. Insert three simple rectangles in a vertical stack, then type Collect, Check, and File into them. Use equal sizes so alignment differences are easy to see. Leave a comfortable gap between the objects. Put the middle rectangle slightly farther to the right than the others. This small mistake gives you a clear before and after without needing a complicated slide full of unrelated decoration.
Save a copy before changing positions. The example is an original process diagram, not a reproduction of a real software screen. Choose a readable label size and a simple contrasting fill. Avoid shadows during the alignment exercise because a strong shadow can make an object appear offset even when its geometry is correctly positioned. You can add visual styling after the structural arrangement is stable and you have checked it in Slide Show view.
Show the guide and choose its purpose
On the View tab, turn on Guides if that control is available in your desktop version. Default guides provide useful central references. Decide whether you want the rectangles centered on a vertical guide or aligned by a particular edge. These are different relationships. For this exercise, center the stack on the slide's vertical guide. Keeping the intention simple helps you judge whether the diagram is actually aligned rather than merely close to an arbitrary line.
Select the first rectangle and move it toward the vertical guide. Watch the object and the available alignment feedback as you drag. Then position the other two rectangles against the same reference. Work with one object at a time so you can see which one is moving. If your installation offers additional guide controls, consult the current desktop help before adding or removing guides. Keyboard modifiers and guide commands can differ between Windows and Mac versions.
Check alignment separately from spacing
Look at the stack after all three centers line up. The gaps between objects may still be unequal. A shared vertical guide only establishes the horizontal position you chose; it does not automatically create equal vertical spacing. Adjust the gaps separately or use the appropriate Align and Distribute commands for selected objects. Confirm the command is working relative to the selected objects or the slide as intended before applying it to a finished diagram.
For a useful comparison, move Check downward by a small amount while leaving its horizontal position unchanged. The stack remains aligned but its rhythm becomes uneven. Undo that change, then move Check sideways. Now the spacing can remain acceptable while alignment is wrong. Seeing these two failures separately makes it easier to diagnose a messy slide. You can ask a colleague whether the problem is a drifting edge, a centerline, an inconsistent gap, or inconsistent shape dimensions.
Keep the diagram editable
Replace the middle label with Check the count. If the text becomes crowded, consider a deliberate change to all three shapes rather than enlarging just one without reviewing the stack. A guide can help you maintain the chosen centerline after resizing. Text inside an object also has its own alignment settings, so centered shapes do not guarantee centered text. Inspect both the object positions and the labels before treating the layout as finished.
Do not draw a visible line on the slide merely to imitate an editing guide unless that line has a real explanatory purpose. A visible connector tells the audience something about the process; a guide helps the author place objects. Keeping those roles distinct avoids accidentally presenting a construction aid as part of the diagram. If connectors are needed, add them intentionally and verify that their direction matches the order Collect, Check, and File.
Resolve common positioning problems
If dragging moves several objects unexpectedly, check whether they are grouped or whether more than one object is selected. If an object seems impossible to grab, the Selection Pane can help identify it, but this practice diagram should remain simple enough to select directly. When labels look misaligned despite matching object positions, compare internal text margins and paragraph alignment. A long word or a different font weight can create an optical imbalance without changing the actual rectangle location.
This workflow targets desktop PowerPoint with drawing guides. Web and mobile versions may expose different controls, and smart alignment feedback is not the same thing as a persistent drawing guide. Microsoft's current help distinguishes these aids. Do not promise that every recipient can edit guides in the same way. Share the editable presentation and, if appropriate, a PDF for viewing. Check the visual result in the viewing format your audience will actually use.
Test the final slide
Hide the editing guides and run the slide show. The rectangles should still look aligned because the layout now carries the relationship. Ask a reader to describe the process order without seeing the construction aids. For an exercise, create a second slide with a left aligned stack instead of a centered stack. Which version better supports a long label, and what should stay consistent when that label changes? Keep the version that explains your actual process most clearly.